Few events cause as much immediate chaos and anxiety for a homeowner as water damage. Whether triggered by a sudden flash flood, an undetected roof leak during a torrential storm, or a burst main pipe in the dead of winter, unwanted water destroys building materials, ruins personal possessions, and threatens the structural integrity of your house. Within mere hours, clean drywall turns soft, wood flooring warps, and invisible fungal spores begin to colonize damp framing.
Restoring a home after an inundation requires far more than soaking up puddles and running a few household fans. It demands a systematic approach that moves from emergency extraction and structural drying to teardown, exterior sealing, and resilient rebuilding. Skipping critical steps or ignoring sub-grade seepage often leads to catastrophic long-term problems, including toxic mold growth, foundation decay, and denied insurance claims.
This guide delivers a comprehensive roadmap for navigating the entire restoration process. By understanding how to address overhead vulnerabilities, seal below-grade walls, and rebuild with impact-resistant materials, you can transform a water-damaged property into a stronger, safer, and far more resilient home.
Immediate Emergency Response and Hazard Assessment

The first 24 to 48 hours following a water intrusion event determine whether your home can be successfully restored or if secondary damage will take hold. Before rushing inside to salvage belongings, you must carefully evaluate environmental and structural hazards to protect yourself and your family.
First, secure the physical environment. Electrical currents travel quickly through standing water, turning flooded basements and hallways into dangerous shock hazards. Shut off the main circuit breaker if you can safely reach the electrical panel without stepping through water. If the panel is located in a damp basement or near standing water, contact your local power utility to disconnect service remotely. Wear appropriate personal protective equipment (PPE), including steel-toe rubber boots, heavy nitrile gloves, and an N95 or P100 respirator mask to protect against airborne mold spores, sewage contaminants, and sharp debris.
Once safety is established, stop the water source if possible. Close main municipal shutoff valves, isolate broken appliance lines, or place temporary heavy-duty tarps over damaged roof areas. Immediately begin documenting everything for your insurance carrier. Take clear, high-resolution photos and video footage of standing water levels, high-water marks on walls, damaged furniture, ruined appliances, and affected structural framing. Do not throw away damaged property until an adjuster has inspected it or your remediation team has fully cataloged it on a contents inventory sheet.
Simultaneously, professional water damage restoration technicians must be dispatched to begin industrial-grade extraction. Standard shop vacuums and residential carpet cleaners lack the motor power to pull water from deep within subfloors, wall cavities, and concrete slabs.
Diagnosing Roof Leaks and Exterior Enclosure Failures
When water invades from above, the source is rarely as obvious as a single missing shingle. Wind-driven rain can travel dozens of feet along rafters, underlayment layers, and ceiling joists before dripping through a light fixture or drywalled ceiling, making a methodical exterior inspection essential.
Start by examining overhead vulnerabilities from both the attic interior and the exterior roof deck. Inside the attic, look for water staining on roof sheathing, rusted nails, dark streaking along chimney chasms, and damp insulation. Outside, inspect vulnerable penetration zones where roofs meet vertical walls, dormers, vent pipes, and skylights. Over time, metal flashing expands and contracts, causing sealant joints to fail and creating direct pathways for rainwater.
When addressing severe storm damage, homeowners must evaluate whether spot repairs or complete structural replacements are required. While localized shingle fixes might temporarily halt a drip, age-damaged underlayment or sagging roof decking warrants an evaluation by a reputable roofing company. A professional assessment identifies hidden rot in structural rafters, verifies if deck plywood needs replacement, and ensures the entire overhead assembly meets local wind and uplift codes.
When booking emergency roof repair, ensure the technicians address the root causes of moisture trap zones rather than applying superficial patches. Proper repair involves stripping away saturated underlayment, replacing rotted plywood decking, installing self-adhering ice and water shields along eaves and valleys, and integrating rust-resistant flashing. Correcting these overhead weaknesses stops immediate leaks while protecting your home against future ice dams and severe weather events.
Upgrading Exterior Materials for Maximum Storm Resilience
Restoring a home after a water disaster provides a rare opportunity to upgrade vulnerable exterior building materials with options that resist future weather extremes. Traditional exterior claddings, such as wood lap siding, vinyl panels, and stucco, often fail under heavy wind-driven rain. Wood absorbs moisture and rots, vinyl cracks under hail impact, and stucco traps moisture against structural shear walls.
To create a virtually impenetrable outer defense, consider wrapping your home in heavy-duty metal wall cladding. Modern metal siding supplies include insulated steel panels, standing-seam wall profiles, and aluminum architectural tiles designed to create a pressure-equalized rain-screen system. These non-porous cladding options do not absorb moisture, resist impact from windborne debris, and prevent rain from reaching wood wall framing even during hurricane-force storms.
Installing advanced exterior cladding requires specialized skills and precise mechanical fastening. Partnering with certified roof installers ensures that wall-to-roof intersections, window caps, and fascia details are integrated correctly. Experienced installers understand how metal panels expand and contract with temperature swings, using sliding clip systems and high-grade butyl sealants to keep seams watertight year after year.
Furthermore, combining metal wall panels with high-performance synthetic air-and-water barriers creates a dual-layer defence. If moisture somehow penetrates the outer metal skin, the secondary drainage plane redirects the water down to weep holes at the base of the wall, keeping internal stud cavities dry.
Sourcing Cost-Effective, High-Durability Building Supplies
Managing a post-disaster budget is one of the most challenging aspects of home restoration. Insurance payouts often lag behind immediate repair bills, leaving homeowners to navigate material costs and labor expenses during a stressful time.
One effective strategy for stretching your restoration budget without sacrificing material quality is sourcing wholesale metal roofing directly through regional distributors or manufacturer-direct supply programs. Purchasing materials wholesale cuts out middleman markups, allowing you to upgrade from basic architectural shingles to commercial-grade 24-gauge steel or aluminum roofing panels at a fraction of standard retail pricing.
Once you have secured high-performance roofing materials, schedule installation through a licensed roofing service that specializes in standing-seam and concealed-fastener systems. Unlike exposed-fastener roofs, which rely on rubber washers that degrade under UV exposure every 10 to 12 years, standing-seam systems hide all mechanical fasteners beneath locked metal seams.
This design eliminates thousands of screw penetrations across your roof deck, creating a clean look capable of withstanding standing snow, torrential downpours, and severe winds. Investing in high-grade materials installed by qualified professionals lowers long-term maintenance costs and elevates your home’s resale value.
Tackling Sub-Grade Inundation and Foundation Leaks
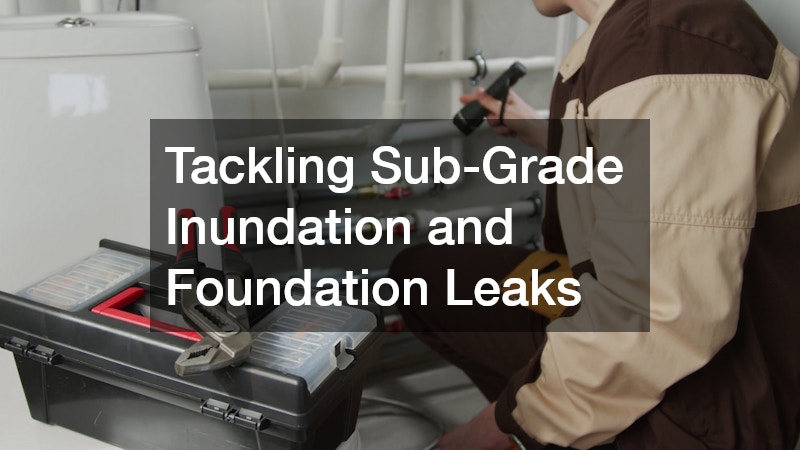
While roof leaks cause top-down damage, sub-grade water intrusion poses a direct threat to your home’s structural foundation. Groundwater flooding, rising water tables, and poor yard drainage exert immense hydrostatic pressure against buried basement walls and concrete footings.
Hydrostatic pressure forces water through the tiny pores, cold joints, and hairline cracks inherently present in poured concrete and cinder block foundations. Common signs of sub-grade water intrusion include:
- Efflorescence: A powdery white crystalline salt deposit left behind on interior concrete walls as evaporating groundwater migrates through the masonry.
- Horizontal Wall Bowing: Structural deflection along foundation midpoints caused by oversaturated exterior soil expanding against concrete blocks.
- Rim Joist Decaying: Dark mold growth, soft spots, or water staining where the wooden floor frame rests atop the concrete foundation wall.
To permanently resolve severe groundwater intrusion, property owners must apply external barriers that stop water before it touches the foundation. Hiring a specialist to apply concrete waterproofing services involves excavating soil around the foundation down to the footings.
Technicians clean the exposed concrete, fill structural cracks with hydraulic cement, and apply seamless elastomeric asphalt membranes reinforced with dimpled drain boards. This exterior drainage matrix directs subterranean water down to perforated footings pipes, preventing hydrostatic pressure from building against basement walls.
Complementing exterior membranes with an interior perimeter drainage network provides complete protection. Interior French drain systems feature a trench cut around the edge of the basement slab, lined with perforated pipe, and pitched toward a heavy-duty sump pit. Installing dual sump pumps equipped with battery-backup power ensures your basement stays dry even during severe storms when primary power fails.
Eliminating Sub-Grade Moisture for Long-Term Defense
Even after standing floodwaters are pumped out and structural walls are sealed, subterranean spaces retain high humidity levels that foster toxic mold growth and dry rot. Concrete is naturally porous, drawing ground moisture upward through capillary action—a phenomenon known as damp rising.
Eliminating persistent subterranean moisture requires contracting a certified basement waterproofing company. Experienced contractors look beyond quick surface sprays, conducting thorough diagnostic testing to evaluate soil conditions, exterior grading, downspout discharge zones, and internal vapor transmission rates.
Comprehensive basement waterproofing services combine heavy-duty mechanical moisture control with physical vapor barriers. Technicians mechanically fasten thick, multi-layer reinforced polyethylene vapor liners to interior concrete walls, sealing the edges to direct any wall condensation straight into sub-slab drainage tracks.
Simultaneously, installing a dedicated, low-temperature commercial dehumidifier maintains basement relative humidity below 50%. Keeping humidity under control prevents mold spores from settling on floor joists, protects HVAC equipment from rust, and creates a clean indoor environment suitable for finishing into extra living space.
Interior Restoration and Mold Prevention Procedures
Once exterior enclosures are watertight and foundation walls are fully sealed, focus shifts to interior demolition, sanitization, and rebuilding. Rushing to install new drywall and flooring over damp framing is one of the most expensive mistakes a homeowner can make, as it seals moisture inside wall cavities where mold thrives unseen.
Begin interior teardown by applying the standard “flood-cut” rule. Remove all saturated drywall, plaster, and fiberglass insulation at least 12 to 24 inches above the highest water mark. If floodwaters reached 18 inches up a wall, cut the drywall away at the 48-inch line to allow full stud exposure.
Remove soaked carpeting, pad underlayments, laminate flooring, and warped hardwood strip flooring down to the subfloor. Strip away wet baseboards and door casings, as damp wood trim holds moisture directly against wall plates.
With stud bays exposed, deep cleaning and sanitization can begin:
- HEPA Vacuuming: Pass commercial HEPA-filtered vacuums over all exposed wood studs, floor joists, and subflooring to remove dried silt, dust, and inactive fungal spores.
- Antimicrobial Washing: Scrub structural timbers using EPA-registered botanical antimicrobials or quaternary ammonium solutions to neutralize bacteria and fungi.
- Mechanical Scrubbing: Wire-brush heavy wood framing to scrub away deep-seated mold hyphae and embedded river silt.
Rebuild interior living spaces using water-resistant materials engineered to survive potential future leaks. Replace traditional paper-faced drywall with glass-mat mold-resistant gypsum boards in basements, bathrooms, and laundry rooms.
Upgrade subflooring to marine-grade plywood or cementitious backer boards, and finish floors with 100% waterproof luxury vinyl plank (LVP) or porcelain tile set in polymer-modified thinset mortar. These inorganic materials do not provide a food source for mold and can be sanitized if water ever enters the space again.
Navigating Insurance Claims and Preventing Future Disasters

Rebuilding your home after a water disaster involves managing administrative and financial responsibilities alongside structural repairs. Successfully navigating property insurance claims requires clear documentation, persistent communication, and a clear understanding of your policy’s terms.
Maintain a detailed claim journal from day one. Log every phone call, email, and site visit with insurance adjusters, restoration contractors, and structural engineers. Note the date, time, person spoke with, and a summary of what was discussed or agreed upon.
When presenting repair estimates to your insurer, ensure line items use standardized industry pricing software (such as Xactimate) so your claims adjuster can evaluate labor, material, and equipment costs easily. If your carrier’s settlement offer falls significantly short of real-world repair quotes, consider hiring a licensed public adjuster to advocate on your behalf.
Simultaneously, upgrade your home’s exterior drainage infrastructure to protect your newly restored interior against future storms:
- Extend Downspout Discharges: Direct all roof downspout drainage pipes at least 10 feet away from foundation walls using rigid, smooth-wall PVC underground piping that empties to daylight or a pop-up emitter.
- Regrade Foundation Soil: Slope surrounding topsoil away from the house foundation at a minimum grade of 6 inches over the first 10 feet to keep surface runoff from pooling against concrete walls.
- Install Smart Leak Detection: Place wireless water sensors beneath water heaters, washing machines, refrigerators, and sink vanities, linked to an automatic main line shutoff valve that cuts off water instantly when a leak is detected.
Recovering from severe water damage is a demanding journey that requires patience, methodical planning, and expert execution. From the minute emergency extraction begins to the final application of mold-resistant interior paint, every decision you make shapes the safety, durability, and value of your living space.
By addressing overhead roof leaks with heavy-duty claddings, sealing foundation walls against groundwater pressure, and insisting on thorough interior sanitization, you do more than fix cosmetics, you build a resilient home ready to withstand severe weather. Taking a proactive approach transforms a disruptive flood into an opportunity to construct a safer, healthier, and far more durable place for your family to live.